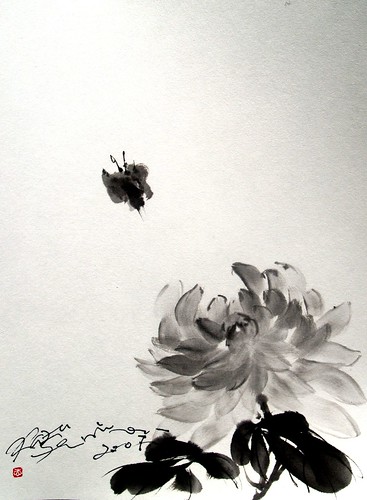
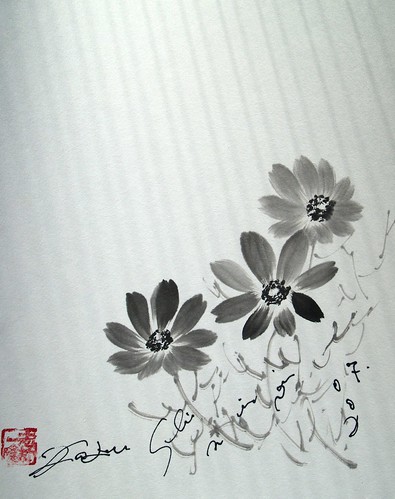
The time line in the Christianity draws straight while it goes the circle in the Orient, Asian point of view. You go up in the heaven in the West while the reincarnation world. I put the botanics which turns around year by year for thousand years to a cross shape. The integration of philosophy generates looks modern.
朝顔を英和辞典で引くと、morning glory ってでてきます。でもこれ、俗語で、朝●ち。。。という意味もあるらしい。オアシスに、what’s the story mornig glory って曲がありますよね。「朝顔さん、教えて!」みたいな意味かとずーっと思ってたら、その俗な意味を知って、やっと腑に落ちました。
Four petals consists of one asagao flower. Each of petals is depicted one stroke except the last one(left side petal).
You need the light black ink and the hair of the brush keeps little much water as always as we do in the flower drawing 🙂
The first petal stroke is to slide the left to the right. It is important that you have to lean the brush almost along with the paper (equilibrium to the surface of the paper, make sense? )
The second petal is the bottom one. Slide the brush left to the right.
The third petal is the right side. Brush stroke from upside to down in order to connect the top one and the bottom(the second petal).
The last petal is the left side. The top of the hair points at the right side. The shaft of the brush stands upright.
The point of petal drawing is that you have to make circle shape inside. This circle shape would be the elliptic oval depending on the viewing point.
Then, the bell shape part under the petal. Two strokes.
Calyx
The very black ink. Use only the top of the hair and two strokes.
Leaves
Six strokes is needed to depict the asagao flower.
You need the very black ink.
Two strokes for the lower part. Slide the brush little with only putting the top of the hair. Then, lay the brush down until the body of the hair touching the paper. The round shape of the hair will stamp the paper and that turns the bottom part of the leaves.
The upper part of the leaf has two strokes as well. The slide direction goes from the center to the edge. Use only the top of the hair.
What you need : Brush(fude), suzuri(ink stone), sumi bar and rice paper(wa shi) , small white plate, clothes Video 1 below tutorial shows 1)Preparation for drawing (making sumi ink and load sumi in the brush(fude), 2) Straight Stroke(Choku-Hitsu), 3) Side Stroke(Soku-Hitsu), 4) Thin Line Drawing(Sen-Byo), 5) Small Leaves Drawing
1) Preparation for Drawing
1. Make sumi ink
Put water in the hole part of suzuri. Have a sumi bar and dip it into the water. Grind sumi bar on the no water part of suzuri. Hold sumi bar with 45 degree toward the surface of suzuri. Grind sumi bar with very little power and grind it like drawing circle. Imagine that tiny particle coming out of the ink bar. The sense of sumi ink rises meanwhile. Done when the water turns out the black ink.
2. Put sumi into Fude
Put fude into the water. Put fude onto the clothe in order to wipe water out. Don’t move fude, just put it on softly. Shape the tip of the hair of fude(fude-saki) sharpened. Put sumi ink into fude in the suzuri. Squeeze sumi ink out of fude in the small white plate. Draw fude on the edge of the small plate, to squeeze sumi out.
3. Calibrate the sumi ink black color
Put the water in fude. Squeeze water out onto the sumi in the plate and mix it. Squeeze out the whole mixed sumi-water, which turns out the light black. Then, ladle that light black sumi into fude. Dip the fude-saki into the sumi ink in suzuri. Shape fude on the clothe. You all set for drawing.
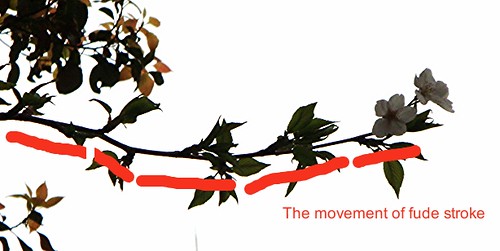
2) Straight Stroke for line drawing
Line drawing from left to right. Fude leans 30 degree to the right. Fude leads the fude hair. The direction of fude points which the line goes. Take half second breath when you put fude on the paper. Then move fude. When you finish drawing the line, take half second breath before you get fude up of the paper. The first line you draw is blacker than the second one. The last sumi ink that you put into fude will put on the paper first. In order to get gradation on drawing, you need the different level of black sumi ink into fude Ink loading preparation is the most important technique in sumi-e. In this rainbow stage, what you have to get is "one brush five gradation" technique. To draw a beautiful rainbow, making an appropriate brush is inevitable.
3) Side stroke (Soku-hitsu)
Use whole side of fude hair. Lean down fude. Hold fude 90 degree cross the line direction.
4) Thin Line Drawing (Sen-Byo)
Bend fude hair on the clothe. Put sumi on the behind only. Hold fude 90 degree cross the line direction. 5) Small Leaves Drawing Put fude on suzuri and get sumi only one side of fude hair Put fude-saki, then push fude and swipe down. (Three action at the same time) Flex the wrist for fude swipe. This technique apply to the cherry blossom drawing.
Video Tutorial 2 includes ; 1) Preparation for Drawing, 2) Draw Bamboo Leaves, 3) Side Stroke(Soku-hitsu), 4) Size of fude
1. Make sumi ink
Put water in the hole part of suzuri. Have a sumi bar and dip it into the water. Grind sumi bar on the no water part of suzuri. Hold sumi bar with 45 degree toward the surface of suzuri. Grind sumi bar with very little power and grind it like drawing circle. Imagine that tiny particle coming out of the ink bar. The sense of sumi ink rises meanwhile. Done when the water turns out the black ink.
2. Put sumi into Fude
Put fude into the water. Put fude onto the clothe in order to wipe water out. Don’t move fude, just put it on softly. Shape the tip of the hair of fude(fude-saki) sharpened. Put sumi ink into fude in the suzuri. Squeeze sumi ink out of fude in the small white plate. Draw fude on the edge of the small plate, to squeeze sumi out.
3. Calibrate the sumi ink black color
Put the water in fude. Squeeze water out onto the sumi in the plate and mix it. Squeeze out the whole mixed sumi-water, which turns out the light black. Then, ladle that light black sumi into fude. Dip the fude-saki into the sumi ink in suzuri. Shape fude on the clothe. You all set for drawing.
4. Draw Bamboo leaves : The example of straight stroke
Scratch back with the tip of the hair of fude (fude-saki) Move down fude Pushing fude onto the paper with moving down. (Two actions : moving and pushing) The part of pushing fude will be the swell of the bamboo leaf Then, Pulling fude off gradually along with the down-move of fude.(Two actions : moving and pulling ) Pull fude off with the fude-saki in order to get the bamboo leaf edge. If you pull fude with the body of fude hair, the edge shape of bamboo leaf will be round. In the end part of bamboo leaf drawing, fude leans down and the fude hair positioned at your side. See the video the fude position change along with the fude hair.
5. Side Stroke
Prepare fude ( very very important ) Lean down fude with 0 degree at the paper. Use the whole fude hair. This technique apply to the tree trunk.
6. The Size of Fude
Fude hair is 3.5 cm length. Made from the weasel. I use only this size fude for all my works. The change fude hair shape and control fude movement is essential for sumi-e technique.
Enjoy 🙂
FAQ1: Almost all rice paper ,wa-shi, gets wrinkly, when you draw. To give someone your suim-e, you need stick another paper backside, so that a paper get right. (this called, ura uchi, ura= back, uchi=stick)
FAQ2: Gradation problem. Try just lay a brush and put it on paper. Like to stamp the brush. If you get right gradation in a brush, you can get shade on paper exactly the brush has.
FAQ3:What Kind of Brush? Hair made of wease is good. The length of hais is about 4- 5cm. Sumie brush hair is harder and shorter than that of calligraphy. Price of it in Japan is 4,000 yen.