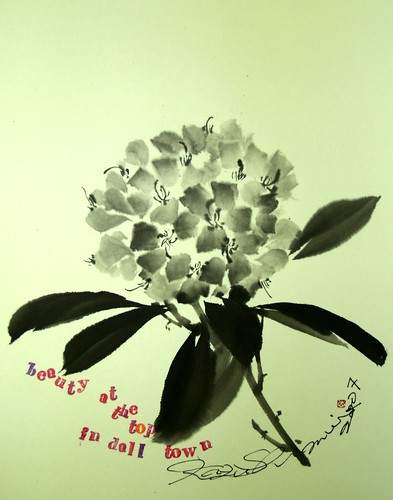
Strange English name for this pretty flower… It has light pink flower with thick green leaves. Ball shape of flower tops on sward leaves radiating. It should originated somewhere in the South Asia, long time journey to Japanese islands. In May, lots of pink ball blooming on streets in the Tokyo old town. A hydrangea and rhododendron must root at the same, thinking the shape of flower and leaves.
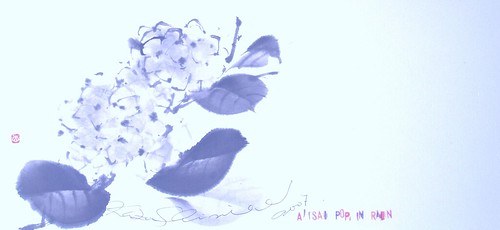
Ajisai – Hydrangea is an favorable icon in the rainy season here. We have big discussion whether it’s already? or not yet in…
Flower of hydrangea have several colors, from blue to white, violet.. and deep green leaves under the flower got your eye contact, usually…. we don’t have rain this year and got the summer sun shine now., I guess we don’t enjoy hydrangea feel.
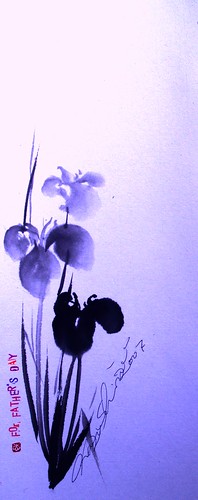
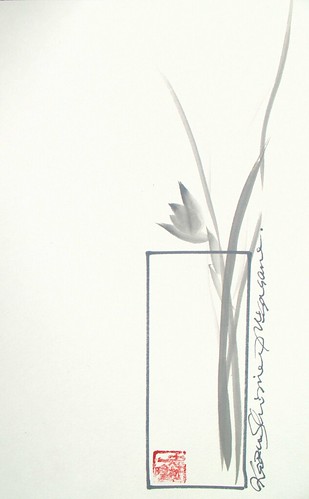
Iris is one of the magnificent flower. It has various colors, blue, violet or white… I hope I could depict those colors in sumi iris flower.
We have at least three spieces, but few understand those differences and figure out such is such. Though I know three names for iris-like flower, I can’t point out the exact names on exact one.
How many names of this flower do you have in your language?
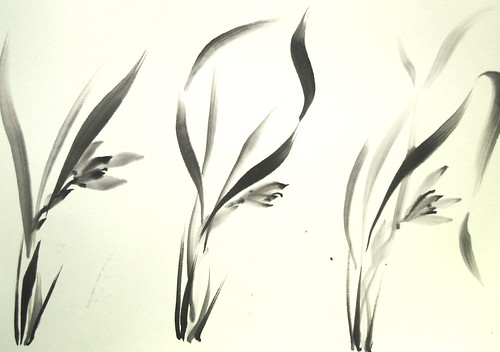
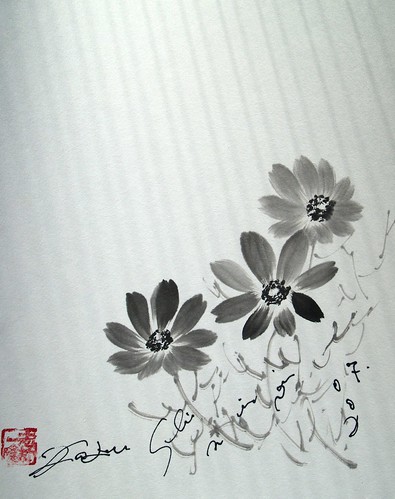
There are four objects for sumi-e starters to learn first, 1) Bamboo, 2) Plum, 3) Chrysanthemum, and 4) Orchid, I think orchid is the most difficult among them, I have not had be confortable when I am done with the line of leaves. It is always that I can find some what I did’t try. To close to the perfect gradation and line shape, sumi ink must be appropreate in brush hair. water as well.. simple not always easy.. but worth try.
Light ink with small squared the tip of the hair of the brush(fude-saki). You squeeze fudesaki after dipping the ink.
The squared fudesaki depict the round tip of the petal.
Draw the center part of the flower. This part of the flower still
like a bud, so the drawing stroke must be short and hard touch. It has
little curving and sweeping at the last part of stroke.
You take a half breath at the first touch of fudesaki on the paper.
That moment gives the round shape of the petal tip and more importantly
the blacker color of the tip.
Eight strokes for the center part.
2. Surrounding petals :
Petals around the center are longer and winding.
The shape of fudesaki is the same as well.
Every stroke must be toward the center. Think the real petals are
connected at the center and each petal grow from the one point.
3. Leaves :
Almost the same as asagao leaves drawing.
One leaf is depicted by eight strokes. Top left, middle left, the
bottom, the middle right, then top right. Two for each small part of
leaves.
The bottom part ; You bring the body of the brush (jiku) down toward
yourself at the last move of the stroke. At that time, the body part
of fude hair must touch on the paper. You pull fude up, then the round
shape will show up. That is the tip of the leaf. Use fude as a stamp.
Wash fude.
Bend the fude hair on the cloth.
Put the very black ink on the ink stone on the behind of the bent fuse hair.
Then, draw the thin vein line on the leaf.
The line won’t show up until the ink becomes dry.
Draw lighter black leaves behind very black one. Remember, draw black one first.
Stems:
Wash fude and bend the fude hair on the cloth.
Put the very black ink on the ink stone.
Draw stem lines.
Chrysanthemum,
Tips 1: the wohle picture of flower build the diamond shape or pentagon.
Tips 2: every piece of flower go toward the center.
Tips 3: leaves around flower must be very black so that the chrysanthemum flower gets colored.
The time line in the Christianity draws straight while it goes the circle in the Orient, Asian point of view. You go up in the heaven in the West while the reincarnation world. I put the botanics which turns around year by year for thousand years to a cross shape. The integration of philosophy generates looks modern.
What you need : Brush(fude), suzuri(ink stone), sumi bar and rice paper(wa shi) , small white plate, clothes Video 1 below tutorial shows 1)Preparation for drawing (making sumi ink and load sumi in the brush(fude), 2) Straight Stroke(Choku-Hitsu), 3) Side Stroke(Soku-Hitsu), 4) Thin Line Drawing(Sen-Byo), 5) Small Leaves Drawing
1) Preparation for Drawing
1. Make sumi ink
Put water in the hole part of suzuri. Have a sumi bar and dip it into the water. Grind sumi bar on the no water part of suzuri. Hold sumi bar with 45 degree toward the surface of suzuri. Grind sumi bar with very little power and grind it like drawing circle. Imagine that tiny particle coming out of the ink bar. The sense of sumi ink rises meanwhile. Done when the water turns out the black ink.
2. Put sumi into Fude
Put fude into the water. Put fude onto the clothe in order to wipe water out. Don’t move fude, just put it on softly. Shape the tip of the hair of fude(fude-saki) sharpened. Put sumi ink into fude in the suzuri. Squeeze sumi ink out of fude in the small white plate. Draw fude on the edge of the small plate, to squeeze sumi out.
3. Calibrate the sumi ink black color
Put the water in fude. Squeeze water out onto the sumi in the plate and mix it. Squeeze out the whole mixed sumi-water, which turns out the light black. Then, ladle that light black sumi into fude. Dip the fude-saki into the sumi ink in suzuri. Shape fude on the clothe. You all set for drawing.
2) Straight Stroke for line drawing
Line drawing from left to right. Fude leans 30 degree to the right. Fude leads the fude hair. The direction of fude points which the line goes. Take half second breath when you put fude on the paper. Then move fude. When you finish drawing the line, take half second breath before you get fude up of the paper. The first line you draw is blacker than the second one. The last sumi ink that you put into fude will put on the paper first. In order to get gradation on drawing, you need the different level of black sumi ink into fude Ink loading preparation is the most important technique in sumi-e. In this rainbow stage, what you have to get is "one brush five gradation" technique. To draw a beautiful rainbow, making an appropriate brush is inevitable.
3) Side stroke (Soku-hitsu)
Use whole side of fude hair. Lean down fude. Hold fude 90 degree cross the line direction.
4) Thin Line Drawing (Sen-Byo)
Bend fude hair on the clothe. Put sumi on the behind only. Hold fude 90 degree cross the line direction. 5) Small Leaves Drawing Put fude on suzuri and get sumi only one side of fude hair Put fude-saki, then push fude and swipe down. (Three action at the same time) Flex the wrist for fude swipe. This technique apply to the cherry blossom drawing.
Video Tutorial 2 includes ; 1) Preparation for Drawing, 2) Draw Bamboo Leaves, 3) Side Stroke(Soku-hitsu), 4) Size of fude
1. Make sumi ink
Put water in the hole part of suzuri. Have a sumi bar and dip it into the water. Grind sumi bar on the no water part of suzuri. Hold sumi bar with 45 degree toward the surface of suzuri. Grind sumi bar with very little power and grind it like drawing circle. Imagine that tiny particle coming out of the ink bar. The sense of sumi ink rises meanwhile. Done when the water turns out the black ink.
2. Put sumi into Fude
Put fude into the water. Put fude onto the clothe in order to wipe water out. Don’t move fude, just put it on softly. Shape the tip of the hair of fude(fude-saki) sharpened. Put sumi ink into fude in the suzuri. Squeeze sumi ink out of fude in the small white plate. Draw fude on the edge of the small plate, to squeeze sumi out.
3. Calibrate the sumi ink black color
Put the water in fude. Squeeze water out onto the sumi in the plate and mix it. Squeeze out the whole mixed sumi-water, which turns out the light black. Then, ladle that light black sumi into fude. Dip the fude-saki into the sumi ink in suzuri. Shape fude on the clothe. You all set for drawing.
4. Draw Bamboo leaves : The example of straight stroke
Scratch back with the tip of the hair of fude (fude-saki) Move down fude Pushing fude onto the paper with moving down. (Two actions : moving and pushing) The part of pushing fude will be the swell of the bamboo leaf Then, Pulling fude off gradually along with the down-move of fude.(Two actions : moving and pulling ) Pull fude off with the fude-saki in order to get the bamboo leaf edge. If you pull fude with the body of fude hair, the edge shape of bamboo leaf will be round. In the end part of bamboo leaf drawing, fude leans down and the fude hair positioned at your side. See the video the fude position change along with the fude hair.
5. Side Stroke
Prepare fude ( very very important ) Lean down fude with 0 degree at the paper. Use the whole fude hair. This technique apply to the tree trunk.
6. The Size of Fude
Fude hair is 3.5 cm length. Made from the weasel. I use only this size fude for all my works. The change fude hair shape and control fude movement is essential for sumi-e technique.
Enjoy 🙂
FAQ1: Almost all rice paper ,wa-shi, gets wrinkly, when you draw. To give someone your suim-e, you need stick another paper backside, so that a paper get right. (this called, ura uchi, ura= back, uchi=stick)
FAQ2: Gradation problem. Try just lay a brush and put it on paper. Like to stamp the brush. If you get right gradation in a brush, you can get shade on paper exactly the brush has.
FAQ3:What Kind of Brush? Hair made of wease is good. The length of hais is about 4- 5cm. Sumie brush hair is harder and shorter than that of calligraphy. Price of it in Japan is 4,000 yen.
The key three lines are, 1)shoulder outline, 2)inside line to abdmen, 3)salnted down line from abdmen. The three lines cross at the key point called "tan-den" where the "ki" power is focused, 9 cm under the navel. Focusing "Ki" at the tan-den point is applied for all martial arts or breathing method like yoga.